How to Select Materials for CNC Prototype Parts

The Right Materials Make All the Difference
Selection of the right materials is paramount to many designs as CNC machining of prototype parts has become even more technical and demanding. You’ll find that basic materials evaluation techniques work for many of the most-used materials including plastic, composites, non-ferrous, ferrous, refractory, red metals and super alloys.
By using the following guidelines, and optimizing designs for worst-case risk, the best materials for the project will be selected. When selecting materials, be sure to consider:
- Physical Properties
The first step is selecting the requirement for the physical properties; these include things such as electrical conductivity, density, modulus of elasticity, thermal conductivity and thermal expansion. - Mechanical Properties
After the physical properties have been identified, mechanical properties are selected. Common properties are standard temper, tensile strength, yield strength, elongation and hardness. - Manufacturability
This step is often ignored, yet is critically important. The selection of improper materials to meet manufacturability standards can be showstoppers. Properties like formability, machinability, and weld ability can be critical. - Environmental Applications
An important part of materials selection is to be sure to take into account recyclability, impact resistance, toughness, surface hardness for wear application, special properties at extreme temperatures, material creep and corrosion resistance. - Application Specifics
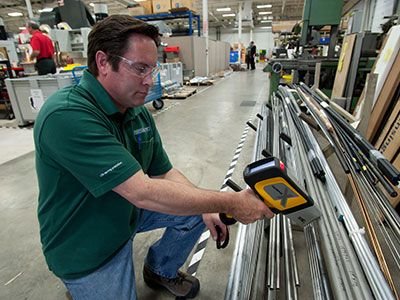
Many applications are highly “Application Specific” with specially designed materials for the application. The engineering team must search and seek them out. A good place to start is to look in similar fields or applications and investigate. If a sample can be acquired, a XRF (X-Ray Fluorescence instrument) can quickly measure the alloy composition. This is a critical tool for reverse engineering applications. Sometimes there are just color, emissivity, finish, ROHS or other industry requirements that are in this area of concern. - Price
Do not make the mistake of selecting the material based on the cheapest price. Although price may be a factor, choosing the wrong material may cost more in the long run. This can occur by requiring more than a weaker material can handle, or simply an environmental or application failure.To prevent this, engineering stress and strain are typically easy to calculate and can be used to determine the minimal design for the application. Use of Finite Element Analysis to determine the design strength is invaluable. Plus, it is imperative to have sufficient safety margins to meet the design requirements.
- Prototype Preparation
Once materials have been selected and the design is ready to prototype, it is time to test and improve the basic design. When finalizing the design, remember to look at the manufacturing process. - Finalizing the Manufacturing Process
This step is often missed, but is very important. Do not forget specifications and process, such as the material or process being subject to hydrogen embrittlement, intergranular corrosion, and plating/anodizing rack mark locations, when and where to laser engrave, and galvanic corrosion for assemblies.
There are many decisions to be made when choosing the best materials and methods for the development of prototypes. At Protomatic, our commitment to life-saving precision means that each step of the manufacturing process is carefully considered, resulting in the highest quality parts for each application.
About the author: Doug Wetzel is Vice President and General Manager of Protomatic. Protomatic is a CNC precision machining shop specializing in prototype and short-run production components for the medical, aerospace and other technical industries. Because of the critical nature of the parts they design and manufacture, the emphasis is always on Life-Saving Precision.


